Using React and TypeScript to build a Google Chrome Extension

Over the years, browser extensions have become deeply integrated with websites. There are now even extensions that are full-blown applications.
As extensions become increasingly complex, developers have created solutions that enabled pre-existing tools to scale and adapt. Frameworks like React, for example, improve web development and are even used — instead of vanilla JavaScript — for building web extensions.
Here, we’ll build a browser extension using Chrome, React and TypeScript.
Creating a React application with Create React App (CRA)
Creating a React application using TypeScript is easy using CRA.
npx create-react-app chrome-react-seo-extension --template typescript
Now with our skeleton application up and running, we can transform it into an extension.
Converting the React app into a Chrome extension
Since a Chrome extension is a web application, we don’t need to amend the code. However, we should ensure that Chrome can load our application.
Extension configuration
All of the configurations for the extensions belong in the manifest.json file, which is currently living in our public folder.
This file is generated automatically by CRA. However, to be valid for an extension, it must follow the extension guidelines. There are currently two versions of manifest files supported by Chrome v2 and v3, but in this guide, we’ll use v3.
Let’s first update file public/manifest.json with the following code:
{
   "name": "Chrome React SEO Extension",
   "description": "The power of React and TypeScript for building interactive Chrome extensions",
   "version": "1.0",
   "manifest_version": 3,
   "action": {
       "default_popup": "index.html",
       "default_title": "Open the popup"
   },
   "icons": {
       "16": "logo192.png",
       "48": "logo192.png",
       "128": "logo192.png"
   }
}name: this is the name of the extensiondescription: description of the extensionversion: current version of the extensionmanifest_version: version for the manifest format we want to use in our projectaction: actions allow you to customize the buttons that appear on the Chrome toolbar, which usually trigger a pop-up with the extension UI. In our case, we define that we want our button to start a pop-up with the contents of ourindex.html, which hosts our applicationicons: set of extension icons
Building your application
To build a React application, simply run npm run build . This command calls react-scripts to build our application, generating the output in the build folder. But what exactly is happening there?
When React builds our app, it generates a series of files for us. CRA compressed the application code into a few JavaScript files for chunks, main, and runtime. Additionally, it generated one file with all our styles, our index.html, and all the assets from our public folder, including the manifest.json.
This looks great, but if we were to try it in Chrome, we would start receiving Content Security Policy (CSP) errors. This is because when CRA builds the application, it tries to be efficient, and, to avoid adding more JavaScript files, it places some inline JavaScript code directly on the HTML page. On a website, this is not a problem — but it won’t run in an extension.
So, we need to tell CRA to place the extra code into a separate file for us by setting up an environment variable called INLINE_RUNTIME_CHUNK.
Because this environment variable is particular and only applies to the build, we won’t add it to the .env file. Instead, we will update our build command on the package.json file.
In the scripts block, edit the build command to the following:
“build”: “INLINE_RUNTIME_CHUNK=false react-scripts build”,
Now if you rebuild your project, the generated index.html will contain no reference to inline JS code.
Loading the extension into your browser
We are now ready to load the extension into Chrome. This process is relatively straightforward. First, visit chrome://extensions/ on your Chrome browser and enable the developer mode toggle:

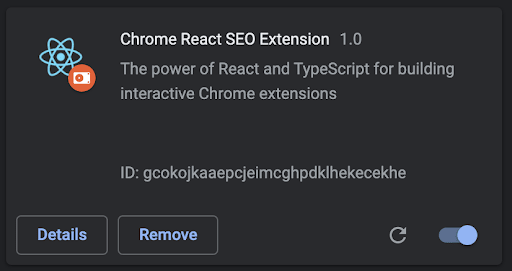
Then, click Load unpacked and select your build folder. Your extension is now loaded, and it’s listed on the extensions page. It should look like this:

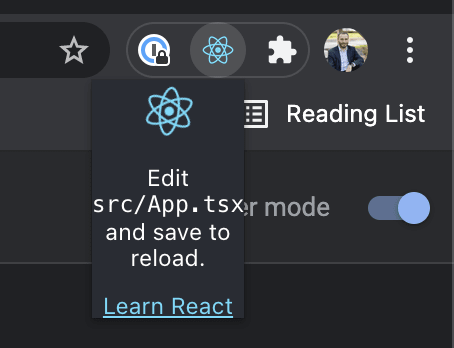
In addition, a new button should appear on your extensions toolbar. If you click on it, you will see the React demo application as a pop-up.

Et voila! Now you're ready to start developing your Chrome Extension Popup using React and TypeScript!